
Not all of our laboratories offer a necropsy service – PLEASE RING and discuss the case and find out if your local laboratory offers this service before sending in any carcasses. The likely cost can also be discussed at this point. Small birds, fish or reptiles may be submitted whole in formalin, but ideally at least open the body cavities and skull to allow penetration of formalin. Again contact your local laboratory to discuss first.
For cases with multiple mortalities it may be worthwhile examining multiple animals.
Submission of necropsy samples will be generally charged per slide. The first slide is the most costly, where as additional slides are relatively inexpensive. So try to send as many relevant tissues as possible.
PERFORMING THE NECROPSY / POST MORTEM EXAMINATION YOURSELF:
Before you start
This protocol includes brief guidelines for performing post mortem examinations in the clinic or on farm. Remember to consider your personal safety and that of your assistants and the laboratory staff with any post mortem examination and submission.
- If you euthanasing the animal for necropsy, consider taking a range of blood samples prior to euthanasia.
- Concentrate on the organs relevant to the clinical signs, but look at everything. This way you familiarise yourself with size, orientation and colour of normal organs.
- Write notes. Try your best to describe any changes using as many descriptors as possible – colour, size (actual measurements rather than comparing to inanimate objects), distribution, number, shape, consistency, smell, weight etc. Aim to ‘paint a picture’ of the lesion in the mind of the reader. TAKE PHOTOS if you’re unsure if something is significant – you can always ask one of us later.
- Take sections of tissues no thicker than 1cm for histopathology (in any one dimension – it doesn’t have to be a cube). Also consider taking fresh samples for culture or virology, ideally 1-2cm cube of the affected tissue into a sterile pot.
- Add abundant formalin (1:10 tissue:formalin is recommended). For larger tissues e.g. brain, you can allow them to fix for several days (ideally 5 days for brain) and then send the tissue in only a small amount of formalin, ideally wrapped in formalin soaked gauze.
- When submitting samples from any case, always ensure the outside of containers are clean and dry, no glassware or needles are submitted, and there is appropriate labelling.
- Make it clear on the submission form (after notifying the relevant government authorities) if a notifiable or potentially zoonotic disease is considered among the differentials.
Initial Examination
Lay the animal on its side. Small animals and horses are generally placed right side down. Ruminants may be done on either side, but some prefer left side down due to placement of the rumen.
Check superficially for wounds, blood in the mouth, eyes sunken, previous surgery, external genitals, condition (fat, thin), skin (alopecia, smell, numerous fleas, thickened or thinned etc).
Opening the Carcass
- Reflect both the front and back limb then skin the top half of the carcass. If you don’t have a sharp PM knife, then a scalpel should suffice.
- After skinning, open the abdominal cavity just behind the ribs, along the midline and lay back like a flap.
- Check the diaphragm is intact then pierce it to check for inrush of air (there should be negative pressure unless there has been pneumothorax or other significant pulmonary lesions).
- Remove the rib cage with rib cutters or foot shears.
- Check that all organs appear to be in their correct sites and are of normal size. Check for evidence of previous spey surgery in females.
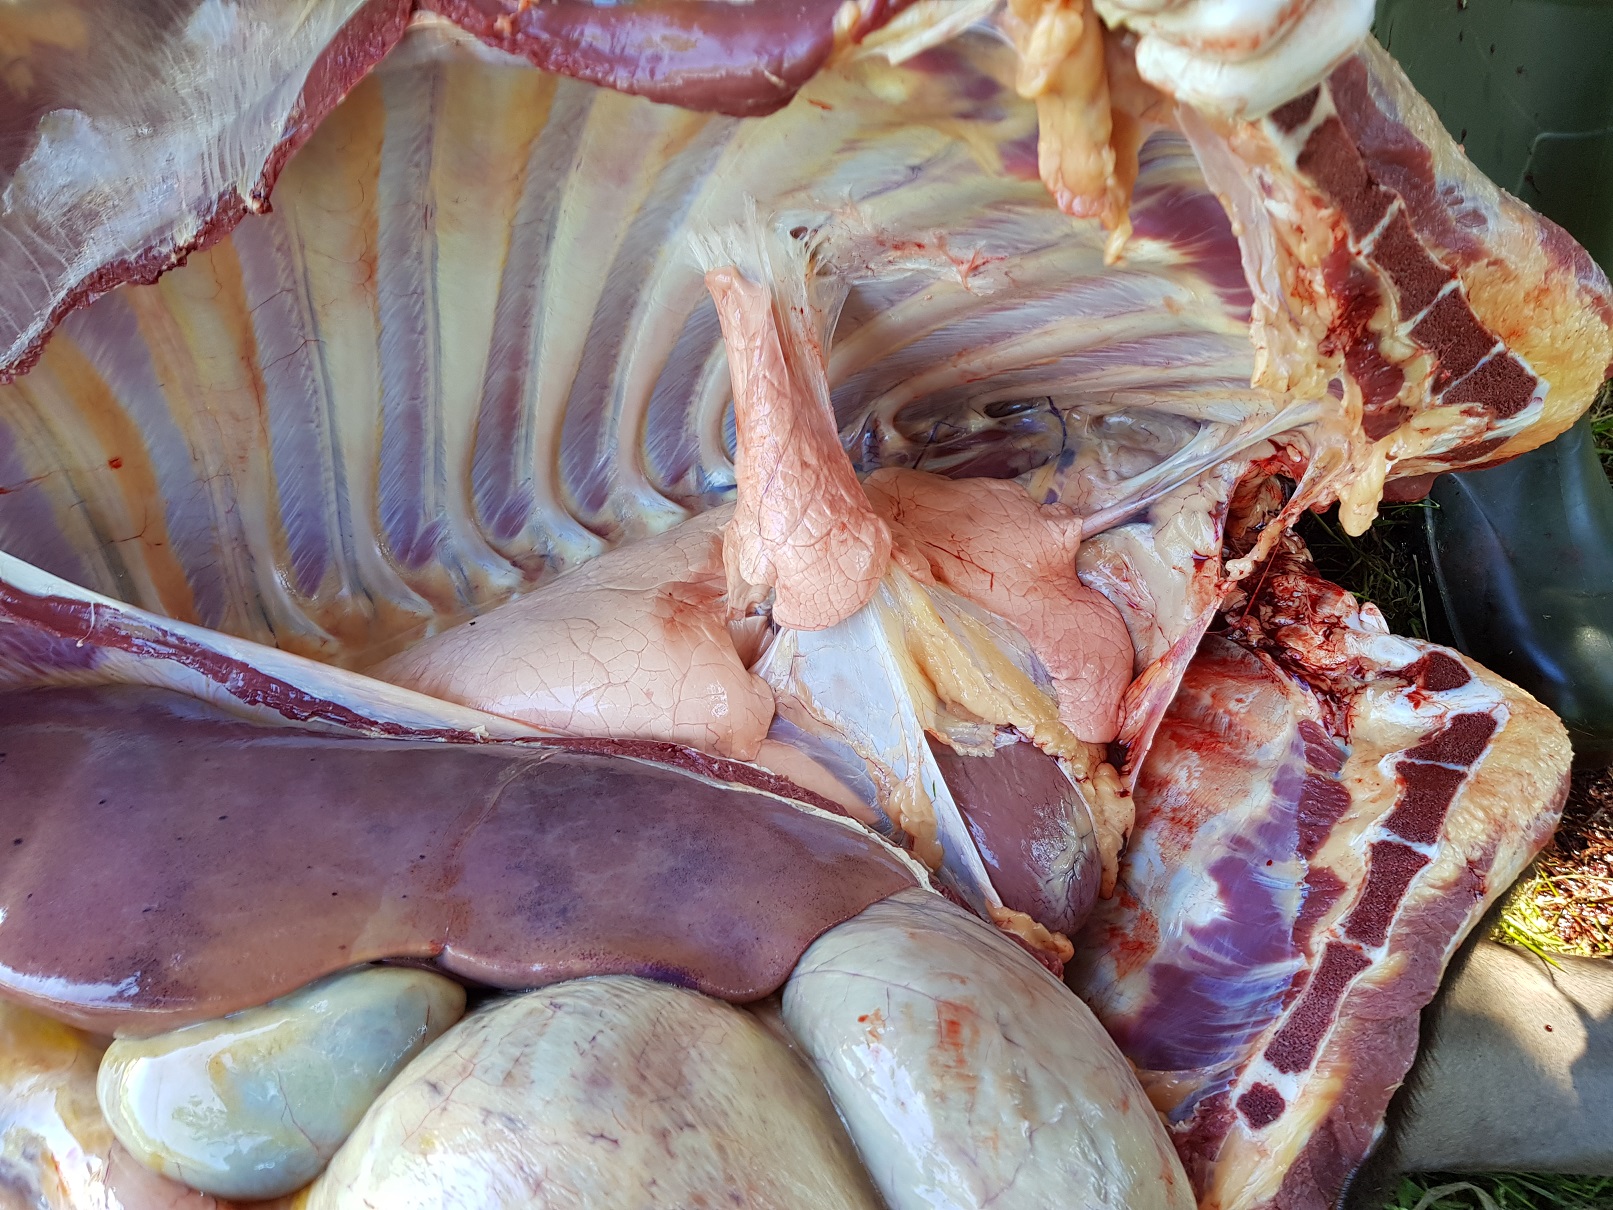
Removing the Pluck:
- Ideally, open the mouth and check for lesions, then slit open the intermandibular space to pull the tongue out. Free the tongue from the mandible and cut the hyoid apparatus in the neck. Remove the trachea with oesophagus by holding the tongue and cutting around the soft tissues of the neck.
- With continued gentle traction on the tongue and oesophagus cut the connections in the chest holding the lungs and heart in place. Cut the oesophagus next to the diaphragm, as well as the aorta and vena cava, to allow removal of the entire pluck.
- Look for the thyroids.
Oesophagus and Lung Investigation:
First slice along the length of the oesophagus with your scissors. Then slice open the larynx and trachea, looking for froth. Follow the bronchi down into the lung as far as your scissors allow (? lungworm). Then check each lung lobe by feeling for softness, any masses etc. Using a new scalpel blade, cut into each lobe and check for edema and congestion, as well as any abscesses or other masses detected. Check the thoracic lymph nodes by assessing their size and slicing into them (normal ones can be hard to find).
Heart Investigation:
Start by examining the size of the atria and ventricles compared to each other. With scissors, slit open the vena cava and open the right atrium, then cut through the atrioventricular valve and enter the right ventricle. Examine the valves and endocardium. Open the pulmonary artery and examine the valve. Open the left atrium and left ventricle (a slice down the middle of them both is easiest) and examine the AV valve. Then cut through the AV valve to open up the aorta and examine the aortic valve. For histopatholgy ideally take a section which includes the right and left ventricle as well as intraventricular septum. Depending on the size of the animal, you could submit the whole heart if you have concerns.
Abdominal Investigation:
- Feel for formed faeces in rectum then cut the rectum, and remove the entire intestinal tract and stomach, as well as the stump of the oesophagus.
- Open the stomach or abomasum and forestomachs to check for feed quantity, type and assess the mucosa- ?any erosions or ulcers.
- Open the small intestine at least at the level of duodenum, jejunum, cecum and colon. If the primary signs are GIT, open the entire tract. It is recommended to take several representative samples throughout the intestines (duodenum, jejunum, ileum, colon) before opening the organ. Keep the tubular sections for formalin small enough that the formalin will penetrate through e.g. 1-2cm long.
- For production animals in particular, collect fresh faecal or small intestinal material for possible parasitology or culture.
- Spleen; check size, any lumps, then slice open in a few areas.
- Mesenteric lymph nodes; slice open a few, check the size is normal.
- Liver; quickly check for evenness of colour, any reticular pattern and whether the gall bladder is full. Make serial slices throughout the organ.
- Kidney; does the capsule peel off easily? Size normal? Any discolouration? Find and follow the ureters- are they even in size?
- Genital tract and bladder; quickly check for abnormalities and slice open the bladder to check the mucosa. Consider collecting urine with a needle and syringe before opening the bladder.
Bone Marrow:
If you suspect a problem here, crack open the proximal femur and collect some marrow into a cassette (if available, or an individual small pot of formalin).
CNS Investigation:
If the necropsy has so far been inconclusive or the history was consistent with neurological disease, sampling of the CNS is recommended.
- Remove the brain and place in a large amount of fixative. We generally recommend fixing the brain whole, but if you think there may be bacterial infection then consider taking one or two small samples for culture.
- If there was ataxia or paralysis, open the vertebral canal and collect the spinal cord.
- If there was blindness remove the eyes and place them in fixative whole.
- Note: For ruminants in particular, if a metabolic condition is suspected, you can collect ocular fluid for analysis of some biochemical analytes i.e. magnesium, calcium, urea, nitrate/nitrite (For further information see Edwards, G & Foster A. Use of ocular fluids to aid postmortem diagnosis in cattle and sheep. In Practice 31:22-25, 2009. ).
Musculoskeletal system:
Open several joints and examine the joint fluid for any thickening or discolouration. Take note of the appearance of muscle that has been exposed during the necropsy procedure e.g. diaphragm.
Suspect toxicity or poisoning
Collect fresh – stomach contents, liver, kidney, skeletal muscle and fat (in separate sterile pots).